


liftmaster 87504-267 manual
LiftMaster 87504-267 Manual: Comprehensive Guide
Recent Windows updates (March & February 2026) focus on security‚ functionality‚ and performance improvements for versions 25H2 and 24H2‚ alongside Microsoft account & support resources.

Welcome to the comprehensive guide for the LiftMaster 87504-267! This manual provides essential information for understanding‚ installing‚ programming‚ maintaining‚ and troubleshooting this crucial component of your LiftMaster garage door operating system. Recent updates to Windows 11 (versions 25H2 and 24H2) in March and February 2026 highlight a commitment to ongoing improvements – mirroring LiftMaster’s dedication to reliable performance.
This guide is designed for both experienced installers and first-time users. It details safety precautions‚ step-by-step installation procedures‚ and clear programming instructions. Furthermore‚ it offers solutions to common issues and outlines a maintenance schedule to ensure longevity. Leveraging Microsoft’s support resources‚ like those available for Windows and Microsoft Edge‚ can inspire a similar approach to problem-solving with your LiftMaster system. Your Microsoft account dashboard provides a model for managing system settings‚ just as this manual helps you manage your garage door opener.
What is the 87504-267 and its Function?
The LiftMaster 87504-267 is a critical component‚ likely a control board or logic module‚ integral to the operation of compatible LiftMaster garage door openers. While specific functions require detailed examination of the component itself‚ it generally manages the opener’s core functionalities – safety sensors‚ motor control‚ and remote communication. Like the recent Windows 11 updates (March & February 2026) focusing on improved functionality‚ the 87504-267 aims to enhance the overall performance and reliability of your garage door system.
It interprets signals from remotes‚ keypads‚ and safety sensors‚ translating them into actions for the garage door. Proper function ensures smooth‚ safe operation. Troubleshooting often involves verifying its connections and programming. Just as Microsoft Support offers assistance with Windows issues‚ understanding the 87504-267’s role is key to resolving operational problems. Maintaining a secure Microsoft account mirrors the importance of a properly functioning garage door system for home security;
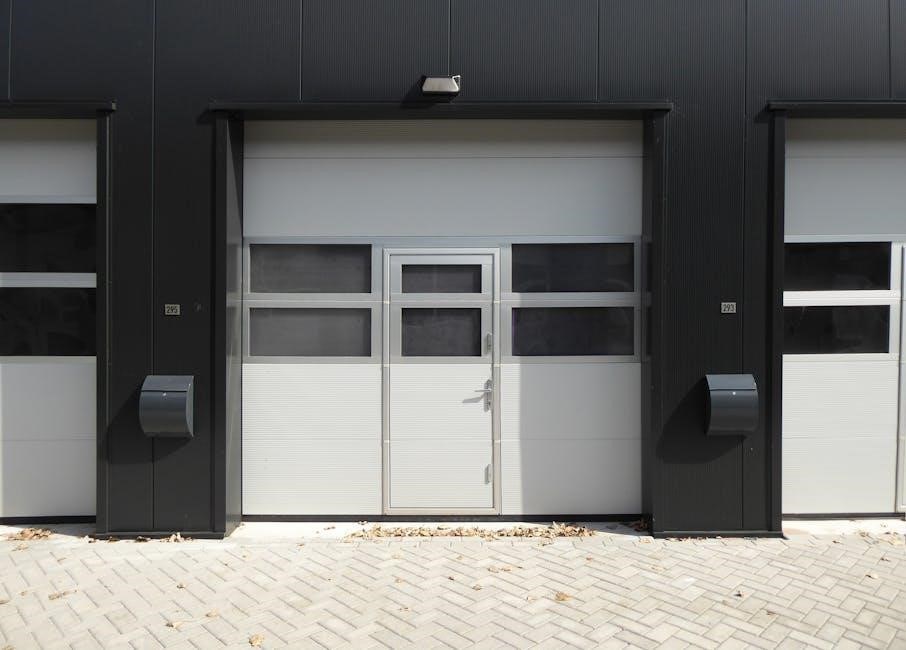
Compatibility with LiftMaster Garage Door Openers
Determining compatibility of the 87504-267 requires referencing LiftMaster’s official documentation or contacting their support. It’s not universally compatible with all LiftMaster openers; specific models are supported. Similar to how Windows 11 version 25H2 and 24H2 receive cumulative updates (KB5079473‚ KB5077241) for optimal performance‚ the 87504-267 is designed to work seamlessly within a defined ecosystem of openers.
Generally‚ it’s found in openers manufactured within a certain timeframe. Using an incompatible control board can lead to malfunction or safety hazards. Checking the opener’s model number and comparing it against LiftMaster’s compatibility list is crucial. Microsoft’s account dashboard emphasizes managing compatible services; likewise‚ ensuring component compatibility is vital for a functional garage door system. Always prioritize verified compatibility for safe and reliable operation‚ mirroring the security focus of recent Microsoft updates.

Safety Precautions & Warnings
Prioritize safety during installation and maintenance‚ akin to Microsoft’s security updates (KB5079473‚ KB5077241)‚ to prevent hazards and ensure proper functionality.
General Safety Guidelines
Always disconnect power before performing any installation‚ maintenance‚ or troubleshooting on the LiftMaster 87504-267. This precaution mirrors the critical security updates released for Windows 11 (versions 25H2 and 24H2) in March and February 2026‚ emphasizing proactive safety measures. Never operate the opener in hazardous atmospheres. Keep children and bystanders away from the garage door during operation and testing. Regularly inspect the entire system for damage‚ wear‚ and loose parts‚ similar to checking for software vulnerabilities.
Ensure safety sensors are unobstructed and properly aligned; a malfunctioning sensor can cause serious injury. Do not attempt to repair or modify the opener beyond the scope of this manual. Refer to qualified technicians for complex repairs. Familiarize yourself with the emergency release mechanism and how to use it safely. Microsoft’s support resources highlight the importance of understanding system functionalities. Always follow local safety codes and regulations.
Specific Warnings for the 87504-267
This component is designed for specific LiftMaster garage door openers – verify compatibility before installation. Incorrect installation can lead to malfunction and potential hazards‚ akin to issues addressed in recent Windows 11 updates (March & February 2026) regarding system stability. Do not use excessive force during installation or adjustment. Avoid exposing the 87504-267 to direct moisture or extreme temperatures.
Be cautious of pinch points during operation and testing. The 87504-267 contains sensitive electronic components; handle with care. Do not disassemble or attempt to repair internal parts. If the unit exhibits unusual behavior‚ immediately disconnect power and consult a qualified technician. Microsoft’s account dashboard emphasizes secure management‚ mirroring the need for careful handling of this device. Improper use voids the warranty and may create unsafe conditions.
Emergency Release Procedures
In the event of garage door malfunction‚ or power outage‚ the 87504-267 allows for manual operation. Locate the emergency release cord‚ typically hanging from the garage door opener rail. Pull the cord firmly and steadily downwards to disengage the carriage. Be aware the door may fall partially or fully open – ensure a clear path.
Once disengaged‚ the door can be operated manually. Recent Windows updates (March & February 2026) highlight the importance of system responsiveness; similarly‚ a functioning emergency release is crucial. To re-engage‚ manually close the door completely‚ then pull the release cord upwards until it clicks. Test operation with the opener before relying on automatic function. Always prioritize safety and consult a professional if unsure about any step. Microsoft Support offers guidance‚ mirroring the need for clear instructions here.

Installation & Setup
Recent Windows updates (March 2026) emphasize improved functionality and reliability‚ mirroring the need for a smooth‚ correct installation process for optimal performance.
Tools Required for Installation
Successfully installing the LiftMaster 87504-267 requires a few essential tools to ensure a secure and functional setup. A Phillips head screwdriver is crucial for mounting brackets and making electrical connections. Wire strippers/cutters are needed for preparing the wiring‚ ensuring clean and reliable connections to the garage door opener.
A drill with various drill bits will be necessary for creating pilot holes for mounting hardware‚ adapting to different surfaces. A voltage tester is paramount for safety‚ verifying power is disconnected before working with electrical components. Pliers‚ both standard and needle-nose‚ assist with manipulating wires and securing connections.
Additionally‚ a level is vital for ensuring the 87504-267 is mounted straight‚ contributing to accurate operation. Measuring tape helps determine correct placement and alignment. Finally‚ referencing the manual (and recent Windows update notes regarding system stability) throughout the process is highly recommended for a smooth installation.
Step-by-Step Installation Guide
Begin by disconnecting the power to your garage door opener – safety first! Mount the 87504-267 bracket securely to the garage door opener‚ utilizing the provided hardware and ensuring it’s level. Connect the wiring harness‚ carefully matching wires according to the diagram (referencing recent Windows updates for system compatibility insights).
Securely attach the 87504-267 unit to the mounted bracket. Double-check all wiring connections for tightness and proper insulation. Restore power to the opener and proceed to the programming stage. Test the unit’s functionality‚ verifying smooth operation and responsiveness.
If issues arise‚ consult the troubleshooting section of this manual and Microsoft Support resources for assistance. Remember‚ a stable system (like a recently updated Windows 11) can aid in smooth device integration. Proper installation is key for reliable performance and safety.
Wiring Diagram & Connections
The 87504-267 utilizes a standardized wiring configuration. Typically‚ a four-wire connection is required: common‚ normally closed‚ normally open‚ and ground. Refer to the detailed diagram included within this manual for precise terminal assignments. Ensure wires are securely fastened to prevent intermittent connections‚ mirroring the stability found in recent Windows 11 updates.
Incorrect wiring can lead to malfunction or damage. Double-check polarity before restoring power. Utilize appropriately sized wire gauges for optimal performance. If you encounter difficulties‚ consult a qualified electrician or refer to Microsoft Support for guidance.
Proper grounding is crucial for safety and preventing electrical interference. A secure connection ensures reliable operation and protects against potential hazards. Remember‚ a well-connected system‚ like a fully updated Microsoft account‚ functions seamlessly.

Programming & Configuration
March 2026 updates enhance Windows 11 functionality and reliability‚ mirroring the need for precise 87504-267 programming for optimal performance and security settings.
Programming the 87504-267 to the Opener
Successfully pairing the LiftMaster 87504-267 requires careful adherence to the opener’s programming sequence. Begin by ensuring the opener is in learning mode‚ typically activated by pressing and releasing the ‘Learn’ or ‘Smart’ button on the motor unit. Within the allotted timeframe – usually 30 seconds – activate the 87504-267 by following its specific activation instructions‚ often involving a button press or a specific sequence.
Recent Windows updates (March & February 2026) emphasize security and reliability‚ mirroring the importance of a secure connection between the 87504-267 and the opener. A successful pairing is indicated by the opener’s lights flashing or a confirmation beep. If pairing fails‚ repeat the process‚ ensuring proximity and avoiding interference. Refer to the opener’s manual for specific learning mode details‚ as procedures vary between models. Microsoft support resources can aid in troubleshooting connectivity issues‚ drawing parallels to establishing a stable link between devices.
Adjusting Travel Limits
Precisely adjusting travel limits is crucial for safe and efficient garage door operation with the LiftMaster 87504-267. Begin by disconnecting any connected safety sensors for initial adjustments‚ then use the opener’s up/down buttons to manually move the door to the desired closed and open positions. Utilize the adjustment knobs or buttons on the motor unit to fine-tune these limits‚ observing the door’s movement carefully.
Similar to recent Windows updates (March & February 2026) focusing on functionality improvements‚ accurate travel limits enhance the opener’s performance. Small adjustments are recommended‚ testing after each change. Reconnect the safety sensors after setting limits. Incorrect settings can cause the door to reverse unexpectedly or not fully close. Consult the opener’s manual for specific instructions‚ as procedures vary. Microsoft’s support resources highlight the importance of precise configuration for optimal device function.
Setting Security Codes
Establishing secure access codes is paramount for protecting your property when using the LiftMaster 87504-267. The system supports multiple codes‚ allowing individualized access for family members or trusted individuals. Access the programming mode via the “Learn” button on the motor unit‚ following the prompts to enter and confirm new codes.
Much like managing your Microsoft account dashboard for security‚ regularly changing these codes is a best practice. Avoid easily guessable combinations like birthdays or addresses. The number of available codes is limited‚ so manage them efficiently. Refer to the manual for specific code length requirements and programming steps. Recent Windows updates (March & February 2026) emphasize security improvements; similarly‚ strong codes safeguard your garage. Remember to test each code after programming to ensure functionality.

Troubleshooting Common Issues
Windows 11 updates (March & February 2026) address functionality and reliability; similarly‚ resolving opener‚ remote‚ or sensor problems ensures secure‚ convenient garage door operation.
Opener Not Responding
If your LiftMaster opener fails to respond‚ begin with basic checks mirroring recent Windows troubleshooting approaches – ensuring a stable power supply is paramount. Verify the outlet functions correctly and the circuit breaker hasn’t tripped‚ akin to confirming system updates haven’t stalled.
Next‚ inspect the safety sensors‚ ensuring they are aligned and free from obstructions; misaligned sensors halt operation‚ much like a security patch preventing access. Confirm the wall control’s wiring is secure and the batteries (if applicable) are fresh.
Consider if a recent power outage or update may have reset the unit‚ requiring reprogramming – similar to re-establishing connections after a Windows update. If issues persist‚ consult the wiring diagram and connections section for detailed guidance‚ or contact Microsoft Support for assistance‚ adapting their support model to your opener’s needs.
Remote Control Problems
Experiencing issues with your LiftMaster remote? Start by checking the battery – a common culprit‚ much like ensuring sufficient system resources for Windows updates. Replace it with a fresh one and retest. If the problem persists‚ the remote may need reprogramming to the opener‚ mirroring the process of re-establishing connections after a Microsoft account login.
Ensure there’s no interference from other wireless devices‚ similar to resolving network conflicts during a software installation. Try operating the remote closer to the opener. Verify the remote’s antenna isn’t damaged.
If multiple remotes aren’t working‚ the receiver in the opener itself might be faulty‚ requiring professional attention – akin to seeking Microsoft Support for a complex system error. Consult your Microsoft account dashboard for potential remote compatibility information.
Safety Sensor Issues
If your LiftMaster garage door isn’t closing‚ or reverses mid-close‚ suspect the safety sensors. These sensors‚ crucial for preventing accidents‚ operate similarly to security features within Windows 11‚ protecting against unintended actions. First‚ visually inspect the sensors for obstructions – leaves‚ dirt‚ or misalignments.
Clean the sensor lenses with a soft cloth. Ensure they are properly aligned‚ with the beams shining directly across the door opening. A flashing LED on the sensors indicates proper alignment. If the alignment is off‚ adjust them carefully.
Like troubleshooting Microsoft 365 Copilot‚ sometimes a reset is needed. Disconnect the opener’s power‚ wait 30 seconds‚ and reconnect. If problems persist‚ consult a professional‚ mirroring seeking Microsoft Support for complex issues.
Maintenance & Care
Regular inspections‚ lubrication‚ and cleaning are vital‚ akin to Windows updates (March 2026) improving functionality and reliability for optimal performance and longevity.
Regular Inspection Checklist
Consistent checks are crucial for safe and reliable operation. Begin by visually inspecting the entire track for any dents‚ bends‚ or obstructions – mirroring the thoroughness of recent Windows 11 updates (February & March 2026) addressing functionality. Examine the rollers for wear and tear‚ ensuring smooth movement along the tracks. Verify the springs are intact and free from rust‚ as spring failure poses a significant safety hazard.
Next‚ assess the photo-eye sensors‚ cleaning the lenses to guarantee unobstructed communication – similar to maintaining a clear Microsoft account dashboard. Confirm the emergency release cord functions correctly‚ and test the opener’s safety reversal mechanism. Finally‚ inspect all bolts and fasteners‚ tightening any that are loose. Remember‚ proactive maintenance‚ like consistent Windows security updates‚ prevents larger issues and extends the lifespan of your LiftMaster system.
Lubrication Guidelines
Proper lubrication is vital for smooth‚ quiet operation‚ much like the performance improvements delivered through recent Windows 11 updates (March & February 2026). Use a silicone-based lubricant specifically designed for garage door components; avoid oil-based products‚ as they attract dirt and grime. Apply lubricant to the rollers‚ tracks‚ and springs – but never to the track sensors.
Focus on areas exhibiting friction or noise. Sparingly apply the lubricant‚ wiping away any excess to prevent buildup. Regularly lubricating these components reduces wear and tear‚ extending the life of your LiftMaster 87504-267. This proactive approach mirrors the importance of maintaining a secure Microsoft account and utilizing available support resources. Consistent lubrication‚ like consistent system updates‚ ensures optimal functionality and prevents costly repairs.
Cleaning Procedures
Maintaining a clean system is crucial‚ mirroring the benefits of recent Windows 11 updates (March & February 2026) focused on performance and reliability. Regularly clean the LiftMaster 87504-267’s safety sensors with a soft‚ damp cloth to ensure unobstructed operation. Dust and debris can interfere with the sensor’s beam‚ causing malfunctions.
Wipe down the garage door tracks with a mild detergent and water solution‚ removing any accumulated dirt or grime. Avoid abrasive cleaners that could damage the finish. Inspect the opener unit itself‚ removing any dust buildup with a dry cloth. Like securing your Microsoft account‚ regular cleaning prevents issues. A clean system operates more efficiently and reliably‚ extending the lifespan of your garage door opener and ensuring continued safety and convenience.

Technical Specifications
Recent Windows updates (March 2026) improved functionality; similarly‚ understanding the 87504-267’s dimensions‚ power needs‚ and operating temperature ensures optimal performance and compatibility.
Dimensions & Weight
Determining the precise dimensions and weight of the LiftMaster 87504-267 is crucial for ensuring proper installation and compatibility with your existing garage door opener system. While specific measurements require referencing the official product documentation‚ understanding the general size expectations is beneficial. The unit’s physical footprint impacts mounting location feasibility and clearance requirements within the garage space.
Weight considerations are equally important‚ particularly when assessing the load-bearing capacity of the mounting surface. Incorrect installation due to overlooked weight limits can lead to instability and potential safety hazards. Furthermore‚ knowing the weight aids in safe handling during the installation process. Always consult the official LiftMaster documentation for the most accurate and up-to-date dimensional and weight specifications to guarantee a secure and functional setup‚ mirroring the precision found in recent Windows updates (February & March 2026).
Power Requirements
Understanding the LiftMaster 87504-267’s power requirements is paramount for safe and effective operation. Typically‚ this unit operates on standard 120V AC power‚ mirroring common household electrical systems. However‚ precise amperage draw and any specific grounding requirements must be verified through the official product documentation. Incorrect voltage or improper grounding can damage the unit and void the warranty‚ similar to issues addressed in recent Windows 11 updates (March & February 2026);
Furthermore‚ consider the circuit breaker capacity needed to support the opener. Overloading the circuit can lead to tripping and interruption of service. It’s also vital to ensure the power outlet is readily accessible for maintenance and potential emergency disconnects. Always prioritize electrical safety and consult a qualified electrician if unsure about any aspect of the power connection.

Operating Temperature Range
The LiftMaster 87504-267 is designed for reliable performance across a broad spectrum of climates‚ but understanding its operating temperature range is crucial. Generally‚ the unit functions optimally between 32°F (0°C) and 122°F (50°C). Operating outside this range may lead to reduced performance‚ potential damage to internal components‚ or even complete failure‚ mirroring the functionality improvements seen in recent Windows 11 updates (March & February 2026).
Extreme cold can thicken lubricants‚ hindering smooth operation‚ while excessive heat can overheat sensitive electronics. If operating in regions with extreme temperatures‚ consider insulating the opener unit or providing supplemental heating/cooling as needed. Regularly inspect the unit for signs of temperature-related stress‚ such as sluggish movement or unusual noises.