Search for:

black and decker steam mop instructions

Welcome to the Black and Decker Steam Mop Instructions, your comprehensive guide to assembling, operating, and maintaining your steam mop for optimal cleaning results. This guide covers everything from initial setup to troubleshooting, ensuring effective and safe use of your steam mop for various floor types.

Overview of the Black and Decker Steam Mop

The Black and Decker Steam Mop is a reliable and efficient cleaning tool designed for sanitizing and cleaning sealed hard floors. It quickly heats up, making it ideal for surfaces like hardwood, laminate, and vinyl. With included accessories such as a flexible hose and window nozzle, it offers versatile cleaning solutions. Its compact design and effective steam output ensure a thorough and easy cleaning experience, perfect for maintaining hygiene and cleanliness in your home.

Importance of Following the Instructions

Following the Black and Decker Steam Mop instructions is crucial for safe and effective use. Proper assembly, operation, and maintenance ensure optimal performance and longevity of the product. Incorrect usage can lead to reduced efficiency or damage to the device. Adhering to guidelines helps prevent accidents, such as burns from hot steam, and ensures thorough cleaning of various floor types. This also aids in troubleshooting common issues and maintaining hygiene standards effectively.

Features of the Black and Decker Steam Mop

The Black and Decker Steam Mop features a quick warm-up time, efficient cleaning performance, and included accessories like a flexible hose and window cleaning nozzle. Its 1300 W power ensures high steam temperatures for effective hard floor cleaning.

Design and Build Quality

The Black and Decker Steam Mop is designed with an ergonomic handle and lightweight frame for easy maneuverability. Its durable construction ensures long-lasting performance, while the compact design makes it easy to store. The mop features a sleek, modern aesthetic and is built with high-quality materials to withstand regular use. These design elements enhance user comfort and efficiency, making it a practical choice for daily cleaning tasks.

Key Components and Accessories

The Black and Decker Steam Mop includes essential components like a durable ergonomic handle, a large water tank, and adjustable steam control. Accessories such as washable microfiber pads, a flexible hose, and a window cleaning nozzle are also provided. These components and accessories enhance versatility, allowing users to tackle various cleaning tasks efficiently. The included parts ensure comprehensive cleaning solutions for different surfaces and needs.

Special Features for Enhanced Cleaning

The Black and Decker Steam Mop features adjustable steam control, allowing users to customize cleaning power for different surfaces. A built-in flexible hose and window cleaning nozzle enable reaching tight spaces and cleaning windows effortlessly. The quick heat-up time ensures fast operation, while the ergonomic design provides comfort during extended use. These features combine to deliver efficient, versatile, and effective cleaning results for various floor types and surfaces.

Safety Precautions and Guidelines

Always use the Black and Decker Steam Mop on sealed floors to avoid damage. Keep children and pets away while operating. Avoid hot surfaces and ensure the mop is placed on a heat-resistant surface when not in use. Follow all safety guidelines in the manual to prevent accidents and ensure safe operation.

General Safety Tips

For safe operation of the Black and Decker Steam Mop, always keep children and pets away. Use the mop only on sealed floors to prevent damage. Avoid touching hot surfaces, and never leave the mop unattended while in use. Ensure the mop is placed on a heat-resistant surface when not in use. Regularly inspect for damage and follow all guidelines in the user manual to ensure safe and effective cleaning.

Precautions Before First Use

Before using your Black and Decker Steam Mop, ensure all parts are assembled correctly and free from damage. Read the user manual thoroughly to understand safety guidelines and operational procedures. Test the mop on a small, inconspicuous area to ensure compatibility with your floor type. Always use distilled water to prevent mineral buildup and maintain optimal performance. Proper preparation ensures safe and effective cleaning.

Operating the Steam Mop Safely

To ensure safe operation of your Black and Decker Steam Mop, always use it on sealed floors like hardwood, laminate, or tile. Avoid carpets, rugs, or unsealed wood. Keep children and pets away while in use. Use distilled water to prevent mineral buildup. Never leave the mop unattended or allow the steam to come into contact with electrical components. Follow the user manual for proper usage and temperature control.

Assembly and Initial Setup

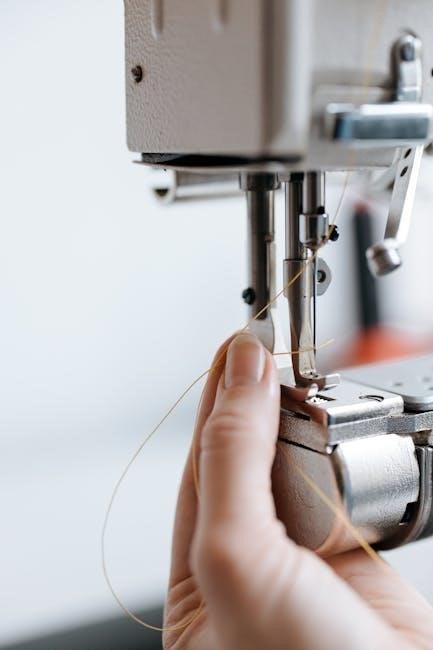
Start by unboxing and inventorying all parts, including the handle, steam mop head, and cleaning pads. Attach the handle securely and prepare the mop for first use by following the manual’s step-by-step guide. Ensure all components are properly aligned and tightened before proceeding.

Unboxing and Inventory of Parts

When you unbox your Black and Decker Steam Mop, carefully inspect and inventory all components. Typically included are the steam mop head, handle, cleaning pads, and accessories like a flexible hose or window cleaning nozzle. Ensure all parts are present by cross-referencing with the user manual. This step is crucial to avoid missing items and ensure smooth assembly. Properly organize the parts before proceeding to the next steps.

Attaching the Handle and Other Components

To assemble your Black and Decker Steam Mop, start by attaching the handle to the main unit. Align the handle’s base with the mop head and secure it using the provided screws. Tighten firmly to ensure stability. Next, attach any additional components, such as the flexible hose or cleaning wand, by following the manual’s instructions. Double-check all connections for proper alignment and security before use.

Preparing the Steam Mop for First Use

Before first use, ensure all components are securely attached. Place a cleaning pad on the floor with the velcro side facing the appliance. Fill the water tank with distilled water to avoid mineral buildup. Avoid overfilling, as this can reduce steam efficiency. Plug in the mop and allow it to preheat for 2-3 minutes. Once ready, the steam mop is set for effective cleaning of sealed floors like hardwood, laminate, and vinyl.

Operating the Steam Mop

Operating the Black and Decker Steam Mop involves preheating for 2-3 minutes, selecting from multiple steam settings, and gliding effortlessly over sealed floors for effective cleaning.

Preheating the Steam Mop

To ensure optimal performance, preheat the Black and Decker Steam Mop by plugging it in, filling the water tank, and turning it on. Allow 2-3 minutes for the water to heat and produce steam. Some models may have an indicator light or sound to signal readiness. Always preheat on a heat-resistant surface and keep children away during this process for safety.

Using Different Steam Settings

The Black and Decker Steam Mop offers adjustable steam settings to suit various cleaning tasks. Use the low setting for delicate surfaces like laminate or sealed hardwood, and higher settings for tougher messes on tile or grout. Adjust the steam control dial or button to customize output. For carpets, use the optional carpet glider with reduced steam. Always match the steam level to the floor type for effective cleaning without damage.

Cleaning Various Floor Types

The Black and Decker Steam Mop is designed for use on sealed hardwood, laminate, linoleum, vinyl, ceramic tile, stone, and marble. For hardwood and laminate, use a low steam setting and a microfiber pad. Tile and grout require higher steam and scrubbing pads. Test a small area first to ensure compatibility. Avoid using steam on unsealed or waxed floors. Adjust settings based on surface type for optimal results.

Cleaning Techniques and Tips

For effective cleaning, use low steam for delicate floors and higher settings for tough stains. Optimize steam output by adjusting settings based on floor type.

Effective Cleaning Methods

For optimal results, adjust steam settings based on floor type and dirt level. Preheat the mop for 2-3 minutes before use. Use microfiber cleaning pads for best results and ensure floors are swept before steaming. For tough stains, apply steam directly and let it sit for a few seconds. Empty the water tank after each use to prevent mineral buildup. Regularly clean the mop head to maintain efficiency.

Optimizing Steam Output

To maximize steam output, use distilled water and avoid mineral-heavy tap water. Ensure the water tank is filled to the recommended level. Adjust steam settings according to floor type and dirt level for efficient cleaning. Regularly clean the mop head to prevent blockages. After each use, empty the tank and wipe down the steam mop to maintain performance. This ensures consistent steam flow and prolongs the product’s lifespan.

Handling Tough Stains and Grout

For tough stains, preheat the steam mop and apply steam directly to the area. Use the scrubbing brush attachment for grout lines and stubborn spots. Allow steam to penetrate for a few seconds before scrubbing gently. Avoid using harsh chemicals; instead, use a mild cleaning solution if needed. Regularly cleaning grout lines with steam helps prevent dirt buildup and keeps floors looking clean and well-maintained. Always test a small area first to ensure no damage occurs.

Maintenance and Cleaning

Regularly empty the water tank and clean the mop head to prevent mineral buildup. Check for blockages in the steam hose and ensure all parts are dry before storage.

Regular Maintenance Tasks

Regular maintenance ensures your Black and Decker steam mop performs optimally. Empty the water tank after each use to prevent mineral buildup. Clean the mop head and steam pad regularly, and replace them as needed. Check for blockages in the steam hose and nozzle. Descale the mop periodically to remove mineral deposits, especially in hard water areas. Store the mop in a dry place to prevent mold growth.

Cleaning the Steam Mop After Use

After each use, clean the steam mop thoroughly to maintain its performance. Empty the water tank and wipe it dry to prevent mineral buildup. Remove and wash the cleaning pad with warm water, allowing it to air dry. Check the steam nozzle and hose for blockages and clean them if necessary. Regularly descale the mop to remove mineral deposits, especially in hard water areas. Store the mop in a dry, cool place to prevent mold growth.

Storing the Steam Mop Properly

To maintain your Black and Decker Steam Mop, store it in a cool, dry place after use. Ensure the water tank is empty and the mop head is completely dry to prevent mold or mildew. Hang the mop upright or lay it flat in a well-ventilated area. Avoid exposure to direct sunlight or extreme temperatures, as this can damage the unit. Proper storage extends the lifespan and ensures optimal performance for future use.

Troubleshooting Common Issues

This section helps diagnose and resolve common problems with your Black and Decker Steam Mop, such as no steam output or reduced performance. Follow the troubleshooting steps to identify and fix issues quickly, ensuring your steam mop operates efficiently;

Steam Mop Not Producing Steam

If your Black and Decker Steam Mop isn’t producing steam, check the water tank for sufficient water. Ensure the tank is properly attached and not empty. Verify that the mop is preheated correctly and that the steam trigger is fully pressed. If issues persist, inspect for mineral buildup or blockages in the steam hose or nozzle. Clean or replace any clogged parts, and descale the mop if necessary to restore steam function.

Reduced Suction Power

If your Black and Decker Steam Mop has reduced suction power, check for blockages in the steam hose or nozzle. Ensure the water tank is not empty and the mop is properly assembled. Regularly cleaning the filter and emptying the water tank can help maintain optimal performance. For persistent issues, refer to the user manual or contact customer support for further assistance.

Other Common Problems and Solutions

Common issues with the Black and Decker Steam Mop include blockages in the steam hose or nozzle, which can be resolved by cleaning or replacing them. If the mop is not producing steam, ensure the water tank is filled and the filter is clean. For inconsistent steam output, check for mineral buildup and descale the mop regularly. Always refer to the user manual for detailed troubleshooting steps.

Accessories and Replacement Parts

The Black and Decker Steam Mop comes with essential accessories like cleaning pads, hoses, and nozzles. Replacement parts, such as filters and pads, can be found online or through authorized dealers.

Included Accessories

The Black and Decker Steam Mop comes with essential accessories to enhance your cleaning experience. These include microfiber cleaning pads for effective dirt removal, a flexible hose for reaching tight spaces, and a window cleaning nozzle for streak-free glass surfaces. Additional attachments like grout brushes and extension wands are also provided, ensuring versatility for various cleaning tasks. These accessories are designed to optimize performance and make cleaning easier and more efficient.

Optional Accessories for Enhanced Functionality

To further enhance your cleaning experience, optional accessories are available for the Black and Decker Steam Mop. These include a SteaMitt for cleaning upholstery, carpet gliders for refreshing carpets, and an extension kit for reaching high areas. Additional microfiber pads and grout brushes can also be purchased to tackle tough stains and grout lines effectively. These accessories provide added versatility and convenience for various cleaning tasks.

Where to Buy Replacement Parts

Replacement parts for the Black and Decker Steam Mop can be purchased directly from the Black and Decker official website or through authorized retailers like Amazon and eBay. Additionally, home improvement stores such as Home Depot and Walmart often carry compatible accessories. Ensure to verify the compatibility of the parts with your specific model before making a purchase. This ensures optimal performance and safety.

Black and Decker Steam Mop User Manual

The Black and Decker Steam Mop User Manual is a comprehensive guide available online as a PDF download. It covers assembly, operation, and maintenance.

Understanding the User Manual

The Black and Decker Steam Mop User Manual is a detailed guide designed to help users understand and utilize their steam mop effectively. It includes sections on safety precautions, assembly, operation, and maintenance, ensuring safe and optimal use. The manual also covers troubleshooting common issues and provides clear instructions for various cleaning applications. By following the manual, users can maximize the performance and longevity of their steam mop while achieving superior cleaning results.

Downloading the Manual Online

The Black and Decker Steam Mop User Manual can be easily downloaded online from the official Black and Decker website or authorized portals. The manual is available in PDF format, making it accessible on various devices. It includes detailed instructions for assembly, operation, and troubleshooting, ensuring users can make the most of their steam mop. Visit the official website or trusted sources like manualsnet.com to download your copy today.

Key Sections of the Manual

The Black and Decker Steam Mop Manual is divided into essential sections, including assembly, operation, maintenance, and troubleshooting. It provides detailed instructions for attaching components, preheating, and using steam settings. The manual also covers cleaning techniques for various floor types and offers tips for optimizing steam output. Additionally, it includes a parts list and warranty information, ensuring users have everything needed for effective and safe use of their steam mop.

Comparison with Other Steam Mops

The Black and Decker Steam Mop stands out for its reliability, efficiency, and user-friendly design. It offers quick heat-up times and versatile cleaning options, making it a top choice among steam mops for hard floors and carpets. Its included accessories and affordable price give it an edge over competitors.

Unique Features of Black and Decker

The Black and Decker Steam Mop boasts a quick heat-up time, allowing users to start cleaning immediately. It features a flexible hose and window cleaning nozzle for versatility. With a powerful 1300W motor, it generates high steam temperatures for effective cleaning. The included accessories enhance functionality, making it suitable for various surfaces like hardwood, laminate, and carpets. Its user-friendly design and affordable price set it apart from competitors.

How It Stands Out in the Market

The Black and Decker Steam Mop stands out for its versatile 10-in-1 design, offering a range of cleaning options. Its flexible hose and window cleaning nozzle provide unmatched convenience. With a quick heat-up time and powerful 1300W motor, it delivers efficient cleaning performance. The inclusion of multiple accessories and its affordable price point make it a top choice for homeowners seeking a reliable and multi-functional steam cleaner.

Customer Reviews and Ratings

The Black and Decker Steam Mop has received positive reviews for its efficiency and ease of use. Many users praise its quick heat-up time and versatile cleaning capabilities. The included accessories and affordable price are also highlighted as key advantages. However, some users note that the durability could be improved and the lack of a SteaMitt accessory is a minor drawback. Overall, it remains a popular choice for hard floor cleaning.

The Black and Decker Steam Mop is a reliable and efficient cleaning tool, offering excellent value for its price. Its ease of use and versatile features make it a great choice for maintaining clean floors. By following the instructions and maintaining the mop properly, users can enjoy long-lasting performance and a spotless home.

Final Thoughts on the Black and Decker Steam Mop

The Black and Decker Steam Mop is a top choice for efficient and effective cleaning. Its user-friendly design, quick heat-up time, and versatile features make it ideal for various floor types. With included accessories like cleaning pads and a flexible hose, it offers convenience and adaptability. The mop’s ability to sanitize and clean effectively ensures a spotless home. It’s a worthwhile investment for anyone seeking a reliable and easy-to-use cleaning solution.

Recommendation for Potential Buyers

The Black and Decker Steam Mop is an excellent choice for those seeking an efficient and versatile cleaning tool. Its ease of use, quick heat-up time, and included accessories make it ideal for various floor types. If you want a reliable and effective steam cleaner for hard floors and more, this mop is a smart investment that delivers consistent results and enhances your cleaning routine;

Frequently Asked Questions (FAQs)

This section addresses common questions about the Black and Decker Steam Mop, including troubleshooting, maintenance, and usage tips, ensuring users can resolve issues and optimize performance effectively.

Common Questions About the Steam Mop

Users often inquire about troubleshooting issues like steam production, maintenance routines, and compatible floor types. They also ask about accessories, optimal cleaning techniques, and how to extend the product’s lifespan; Additionally, questions about replacement parts and warranty details are frequent. This section provides clear answers to these common queries, ensuring users can address concerns and maximize their steam mop’s performance effectively.

Answers from Experts and Users

Experts and users agree that regular maintenance, such as descaling and cleaning the steam mop, is crucial for optimal performance. Many recommend using genuine Black and Decker accessories to ensure compatibility and longevity. Users also highlight the importance of following the user manual for proper assembly and operation. Troubleshooting common issues, like low steam output, often involves simple fixes like checking water levels or filter cleanliness.

nord stage 4 manual pdf

Welcome to the Nord Stage 4 manual, your comprehensive guide to mastering this powerful keyboard. Designed for musicians, producers, and sound designers, this manual unlocks its full potential.

1.1 Overview of the Nord Stage 4

The Nord Stage 4 is a professional keyboard designed for musicians, producers, and sound designers. It combines piano, organ, and synthesizer sounds in one intuitive platform. With advanced features like seamless transitions, enhanced effects, and a user-friendly interface, it delivers exceptional versatility for live performances and studio work. The Stage 4 builds on its predecessors, offering improved sound quality, expanded memory, and new performance modes. Its lightweight and portable design makes it ideal for gigging musicians. Whether you’re a seasoned pro or an aspiring artist, the Nord Stage 4 empowers creativity and precision, making it a cornerstone for modern music production and performance.

1.2 Importance of the Manual

This manual is essential for unlocking the full potential of the Nord Stage 4. It provides detailed insights into its features, operations, and customization options, ensuring users can navigate its interface effortlessly. Whether you’re a beginner or an experienced musician, the manual serves as a comprehensive guide to understanding advanced functionalities, troubleshooting common issues, and optimizing performance. By following the manual, you’ll gain the knowledge needed to maximize creativity and efficiency, making it an indispensable resource for anyone aiming to master the Nord Stage 4. It bridges the gap between technical complexity and user-friendly operation, ensuring a seamless experience for all users.

1.3 Target Audience

The Nord Stage 4 manual is designed for a diverse range of users, including professional musicians, producers, and sound designers. It caters to both experienced keyboardists and newcomers seeking to explore its advanced features. Live performers will find it invaluable for understanding real-time controls and performance modes. Studio musicians can leverage the manual to unlock the full potential of its sound-shaping capabilities. Additionally, educators and students will benefit from its detailed explanations of synthesis, effects, and MIDI integration. Whether you’re a seasoned artist or just starting your musical journey, this manual provides the insights needed to master the Nord Stage 4 and enhance your creative workflow.

Product Overview

Introducing the Nord Stage 4, a versatile professional keyboard designed for exceptional sound quality and creative expression. It seamlessly integrates piano, organ, and synthesizer capabilities with an intuitive interface, making it an ideal tool for both studio and live performances.

2.1 Key Features of the Nord Stage 4

The Nord Stage 4 boasts an impressive array of features, including its renowned piano, organ, and synthesizer sound engines; The intuitive interface allows for seamless navigation, while the A1 Synth Engine delivers dynamic, analog-style sounds. The C2 Organ Engine replicates classic tonewheel organs with stunning accuracy. Additional highlights include the Nord Triple Pedal for expressive control, a comprehensive effects section with delay, reverb, and overdrive, and the ability to create layered and split sounds effortlessly. The Stage 4 also features an OLED display for clear visualization of settings and an extensive library of sounds to inspire creativity. These features make it a powerhouse for both live performance and studio production.

2.2 What’s New in the Nord Stage 4?

The Nord Stage 4 introduces several exciting enhancements, including an improved A1 Synth Engine with expanded modulation capabilities and new waveforms. The C2 Organ Engine now features a more realistic tonewheel simulation and additional drawbar presets. The effects section has been upgraded with new delay and reverb algorithms, offering greater depth and versatility. Additionally, the Stage 4 boasts an enhanced user interface with an OLED display, providing clearer visibility and easier navigation. New performance-focused features include seamless transitions between programs and an advanced layer/split system. These updates make the Nord Stage 4 more powerful and intuitive than ever, catering to both seasoned professionals and aspiring musicians.

System Requirements and Compatibility

The Nord Stage 4 requires a minimum of 4GB RAM and a dual-core processor. It is compatible with Windows 10/11 and macOS 10.15 or later, ensuring optimal performance across platforms.

3.1 Hardware Requirements

To ensure optimal performance, the Nord Stage 4 requires a compatible computer or playback system. A minimum of 4GB RAM is recommended, with 8GB or more suggested for demanding setups. The keyboard itself is lightweight yet durable, designed for both studio and stage use. For seamless integration, a MIDI interface is necessary for connecting to external devices. Additionally, an audio interface is recommended for high-quality sound output. Ensure your system has sufficient USB ports for connectivity. For live performances, a sturdy keyboard stand and reliable power supply are essential. Always verify compatibility with your operating system and hardware configuration before use.

3.2 Software Requirements

The Nord Stage 4 is compatible with both Windows and macOS operating systems. Ensure your system runs on Windows 10 or later, or macOS 10;13 or newer. The Nord Sound Manager software is essential for managing and transferring sounds. Download the latest version from the official Nord website. Additionally, the Nord Stage 4 Operating System must be updated to the latest version for optimal functionality. For music production, a DAW (Digital Audio Workstation) like Ableton Live, Logic Pro, or Cubase is recommended. Ensure all software is compatible with your operating system to avoid performance issues. Regular updates are crucial for maintaining functionality and security.

3.3 Operating System Compatibility

The Nord Stage 4 is compatible with both Windows and macOS operating systems. Ensure your system runs on Windows 10 or later, or macOS 10.13 or newer. The Nord Sound Manager software is essential for managing and transferring sounds. Download the latest version from the official Nord website. Additionally, the Nord Stage 4 Operating System must be updated to the latest version for optimal functionality. For music production, a DAW (Digital Audio Workstation) like Ableton Live, Logic Pro, or Cubase is recommended. Ensure all software is compatible with your operating system to avoid performance issues. Regular updates are crucial for maintaining functionality and security.

Installation and Setup

Installing and setting up your Nord Stage 4 is straightforward. Connect the keyboard, install the necessary software, and follow the on-screen instructions for a seamless experience.

4.1 Downloading the Nord Stage 4 Manual PDF

To download the Nord Stage 4 manual PDF, visit the official Nord website and navigate to the support section. Select the Nord Stage 4 from the product list, then click on the “Manuals & Guides” tab. Choose the PDF format and save it to your device. Ensure you download the correct version corresponding to your keyboard. The manual is free and easily accessible, providing detailed instructions for optimal use. It covers all features, settings, and troubleshooting tips. Save the PDF for offline access and refer to it whenever needed for a seamless experience with your Nord Stage 4.

4.2 Installing the Nord Stage 4

Installing the Nord Stage 4 is a straightforward process. Begin by carefully unboxing and inspecting the keyboard for any damage. Connect the power supply to the designated port and ensure it is securely plugged into a nearby electrical outlet. Next, connect MIDI interfaces or pedals if required, using the appropriate ports. For audio output, link the keyboard to your sound system or recording equipment via the provided audio interfaces. Finally, power on the Nord Stage 4 and follow the on-screen instructions to complete the initial setup. Ensure all connections are secure to avoid signal loss or interference during use.

4.3 Initial Configuration and Settings

After installation, navigate to the Nord Stage 4’s interface to begin initial configuration. Start by selecting your preferred language and display settings. Next, configure MIDI settings to ensure proper communication with external devices. Set the MIDI channel, input, and output preferences according to your setup. Adjust audio settings, such as sample rate and buffer size, to optimize performance. Explore the global settings to customize preferences like velocity curves, pedal assignments, and display brightness. Save your configurations to ensure they are retained for future use. Familiarize yourself with the interface layout and shortcuts to streamline your workflow. Proper initial setup ensures a seamless experience with the Nord Stage 4.

Basic Operations

Mastering basic operations ensures smooth navigation of the Nord Stage 4. Learn to power on/off, select sounds, and adjust levels. Familiarize yourself with the interface and controls.

5.1 Understanding the Interface

The Nord Stage 4 interface is designed for intuitive navigation, featuring a clean layout with clearly labeled buttons, knobs, and a high-resolution display screen. The interface is divided into sections corresponding to the instrument’s primary functions: piano, organ, synth, and effects. Each section includes dedicated controls, allowing seamless access to parameters. The display screen provides visual feedback, showing selected sounds, settings, and real-time adjustments. LED indicators above the buttons highlight active features, ensuring clarity. Familiarizing yourself with the interface enables efficient operation, making it easier to explore and customize sounds during performances or recordings. This design ensures a smooth workflow for both beginners and experienced users.

5.2 Navigating the Manual

This manual is structured to guide you through the Nord Stage 4’s features and operations systematically. Use the table of contents to locate specific sections quickly. Each chapter is divided into subheadings, ensuring easy access to detailed information. Key terms are highlighted in bold, and important notes are italicized for emphasis. Diagrams and screenshots are included to clarify complex concepts. For quick reference, the manual includes an index at the end. To maximize your understanding, read sections in sequence, as later chapters build on earlier material. Use the provided bookmarks or digital navigation tools to jump between sections effortlessly. This organized approach ensures a smooth learning experience.

Advanced Features

Explore the Nord Stage 4’s advanced capabilities, including Performance Mode, Effects Section, and Layer/Split functionality, designed to elevate your musical creativity and workflow to new heights.

6.1 Performance Mode

Performance Mode on the Nord Stage 4 is designed for real-time control and expression, ideal for live performances. It allows seamless transitions between sounds, effects, and layers, enabling dynamic stage presence. Musicians can access favorite sounds instantly, customize them on the fly, and create complex textures using the split and layer functionality. The mode also supports external MIDI control, giving performers full command over their soundscapes. With intuitive controls and a user-friendly interface, Performance Mode empowers artists to deliver captivating shows, making it an essential tool for both seasoned professionals and aspiring musicians aiming to elevate their live performances to new heights.

6.2 Effects Section

The Nord Stage 4’s Effects Section offers a wide range of high-quality processors to enhance your sounds. From reverb and delay to overdrive and compression, these effects can be applied to individual slots or globally. Each effect type features adjustable parameters, allowing precise customization to suit your musical needs. The effects chain can be easily modified, and presets can be saved for quick recall. This flexibility makes it ideal for both live performances and studio productions. With the ability to route effects independently for each sound source, the Effects Section provides unparalleled control over your tone, ensuring your music sounds polished and professional.

6.3 Layer and Split Functionality

The Nord Stage 4’s Layer and Split functionality allows for dynamic sound combinations, enhancing your performance versatility. Layering enables blending of up to two sounds per slot, while Split divides the keyboard into zones with independent sounds. This feature is ideal for creating complex textures or transitioning smoothly between sounds during live performances. The intuitive interface makes it easy to assign sounds to specific zones and adjust their ranges. With real-time controls, you can tweak levels and other parameters on the fly. This advanced functionality empowers musicians to craft rich, layered sounds and seamless transitions, making it a cornerstone of the Nord Stage 4’s creative potential.

Customization and Editing

Unlock the Nord Stage 4’s full potential through extensive customization options; Tailor sounds, configure MIDI, and create personalized profiles with an intuitive interface designed for seamless sound design and performance control, empowering musicians to craft unique sonic experiences.

7.1 Sound Programming

Sound programming on the Nord Stage 4 allows for deep customization of tones and textures. Users can craft unique sounds by adjusting oscillators, filters, and effects. The intuitive interface provides real-time controls for tweaking parameters, enabling precise sound design. With access to a wide range of waveforms and modulation options, musicians can create everything from classic piano tones to cutting-edge synth sounds. The Nord Stage 4 also supports layering and splitting sounds, offering endless possibilities for complex sonic landscapes. Whether you’re a seasoned sound designer or a beginner, the Nord Stage 4’s programming tools empower you to create sounds that match your artistic vision.

7.2 MIDI Setup and Configuration

MIDI setup and configuration on the Nord Stage 4 enable seamless integration with external devices and software. Connect the keyboard to MIDI interfaces, controllers, or computers via MIDI ports or USB. Assign MIDI channels to control external gear or receive commands from other devices. The Nord Stage 4 supports MIDI clock synchronization, allowing it to sync with drum machines or DAWs. Configure MIDI settings such as velocity curves, aftertouch sensitivity, and control messages to tailor the keyboard’s response. Use the MIDI monitor to troubleshoot data transmission. This section guides you through setting up MIDI for optimal performance and compatibility with your music production workflow.

7.3 User Profiles and Presets

The Nord Stage 4 allows you to create and manage user profiles and presets, enabling personalized sound design and organization. Profiles store your custom settings, including sounds, effects, and MIDI configurations. Presets provide quick access to favorite sounds and setups. Organize profiles into categories for easy navigation. Learn how to create, edit, and delete profiles and presets. Understand how to import and export profiles for sharing or backup. This section also covers best practices for managing your library and ensuring your configurations are saved securely. Mastering user profiles and presets enhances your workflow and creativity on the Nord Stage 4.

Troubleshooting

Troubleshooting helps resolve common issues with the Nord Stage 4. Identify symptoms, understand error messages, and apply solutions. Resetting or updating software often fixes problems. Consult the manual or support for persistent issues.

8.1 Common Issues and Solutions

Common issues with the Nord Stage 4 include connectivity problems, sound glitches, or unexpected behavior. Check MIDI connections and ensure drivers are updated. Resetting the device often resolves software-related issues. For sound problems, verify layer and split configurations. If the display freezes, restart the unit. Ensure all cables are securely connected. If issues persist, consult the troubleshooting guide or contact support. Regular updates and backups can prevent data loss. Always refer to the manual for detailed solutions and best practices to maintain optimal performance.

8.2 Error Messages and Fixes

When using the Nord Stage 4, you may encounter error messages such as “MIDI Error,” “Low Memory,” or “Invalid File Format.” For MIDI issues, check connections and restart the device. Low memory warnings indicate the need to delete unused presets or update firmware. “Invalid File Format” errors occur when loading unsupported files; ensure compatibility with Nord Stage 4 formats. If errors persist, reset the device to factory settings or consult the troubleshooting guide. Always refer to the manual for specific solutions and update your software regularly to avoid conflicts. Contact Nord support for unresolved issues.

8.3 Resetting the Nord Stage 4

Resetting the Nord Stage 4 can resolve software issues or revert to factory settings. For a soft reset, press and hold the Shift and Transpose buttons while powering on. This resets settings without losing user data. For a factory reset, hold Shift and Global during startup, then confirm by pressing OK. This erases all user presets and configurations. Always back up your data before performing a factory reset. If issues persist, restart the device or update the firmware. Refer to the manual for detailed reset procedures and ensure proper operation after resetting.

Appendices

The appendices provide essential information, including technical specifications, a glossary of terms, and additional resources for further learning and troubleshooting to help you master the Nord Stage 4.

9.1 Technical Specifications

The Nord Stage 4 boasts an 88-note triple-sensor hammer-action keyboard, weighing 18.5 kg. It features 1 GB memory for pianos, 512 MB for synth, and 4 GB for samples. The keyboard includes 6-part multitimbrality, 2 GB of Nord Sample Library compatibility, and 2 GB of Nord Drum Library compatibility. Effects include Nord Lead 4 synth, Nord C2 organ, and advanced delay effects. Connectivity options include 6 outputs, 2 inputs, and MIDI I/O. The display is a 6;3″ OLED screen, and the unit measures 61.4 x 13.7 x 5.3 inches. This section provides detailed hardware and software specifications for optimal performance and compatibility.

9.2 Glossary of Terms

This section defines key terms related to the Nord Stage 4, ensuring clarity for users. MIDI stands for Musical Instrument Digital Interface, enabling communication between devices. Synth refers to the synthesizer section, generating sounds electronically. Effects are processing tools like reverb or delay. Layers and Splits allow combining or dividing sounds across the keyboard. Performance Mode organizes sounds for live use. Velocity measures key strike force, affecting sound dynamics. Preset is a saved sound configuration. Understanding these terms enhances your ability to use the Nord Stage 4 effectively. This glossary provides a quick reference for unfamiliar terminology.

9.3 Additional Resources

For further learning, explore official Nord resources, including video tutorials and webinars. Visit the Nord website for updated manuals, firmware, and FAQs. Join the Nord User Forum to connect with musicians and technicians. Check out YouTube channels like Nord Tutorials and Synth Secrets for in-depth guides. Download the Nord Stage 4 MIDI editor for advanced programming. Access the Nord Sound Library for exclusive presets. Follow Nord on social media for updates and tips. These resources will enhance your understanding and maximize your use of the Nord Stage 4. Continuous learning ensures you stay updated with new features and techniques.

Congratulations on completing the Nord Stage 4 manual. Mastering this powerful keyboard requires practice and exploration. Use the resources provided to continue your musical journey.

10.1 Final Thoughts

The Nord Stage 4 is a versatile and powerful instrument designed to elevate your musical creativity. By following this manual, you’ve gained the tools to unlock its full potential; Whether you’re performing live or producing in the studio, the Nord Stage 4 offers unparalleled sound quality and functionality. Remember, mastery takes time, so keep experimenting and exploring its features. With practice, you’ll unlock new sonic possibilities and take your music to the next level. The Nord Stage 4 is more than an instrument—it’s a creative partner in your musical journey.

10.2 Continuous Learning

Continuous learning is key to fully harnessing the Nord Stage 4’s capabilities. Explore new techniques, stay updated with firmware releases, and delve into the official Nord resources for tips and tutorials. Engage with the Nord community to share ideas and learn from fellow musicians. Regularly experimenting with sounds and settings will deepen your understanding and creativity. Remember, mastery is a journey, and the Nord Stage 4’s versatility offers endless opportunities for growth. By committing to continuous learning, you’ll unlock new sonic possibilities and ensure your music remains fresh and innovative. Embrace the process and enjoy the evolution of your musical craft.

References

For further information, refer to the official Nord Stage 4 resources, including the Nord website, community forums, and authorized support channels. These sources provide updated guides and assistance.

11.1 Official Nord Resources

The Nord Stage 4 manual and additional resources are available on the Nord Keyboards official website. Here, you can find the complete PDF manual, setup guides, and technical specifications. The site also offers software updates, driver downloads, and detailed troubleshooting guides. For direct support, Nord provides contact information and links to authorized service centers. The official Nord forums and FAQs are invaluable for addressing common queries and learning from experienced users. Ensure to refer to these official sources for accurate and up-to-date information to maximize your Nord Stage 4 experience.

11.2 Community Forums and Support

Engage with the vibrant Nord Stage 4 community through dedicated forums and support groups. Platforms like the Nord User Forum, Reddit, and Facebook groups offer invaluable peer-to-peer support. These communities are perfect for sharing tips, troubleshooting, and learning from experienced users. Many forums host detailed discussions on sound design, performance techniques, and customization. Additionally, user-generated tutorials and patches are often shared, providing unique resources. While these forums are not official Nord resources, they complement the manual by offering real-world insights. Always cross-reference community advice with the official manual to ensure accuracy and compatibility with your Nord Stage 4.

singer manual sewing machine

The Singer Manual Sewing Machine is a timeless piece of sewing history, known for its durability and ease of use. With a rich history dating back to 1851, it remains a popular choice among sewers of all skill levels, offering a reliable and portable option for various sewing tasks.

1.1 Overview of the Singer Manual Sewing Machine

The Singer Manual Sewing Machine is a mechanical, non-electric sewing device designed for simplicity and durability. It operates using a hand crank or treadle, offering precise control over stitches. Ideal for basic sewing tasks, it is lightweight and portable, making it easy to use anywhere. Popular among hobbyists and those who prefer traditional sewing methods, the machine is known for its reliability and ease of operation. It is a timeless tool that combines functionality with a nostalgic appeal, perfect for both beginners and experienced sewers.

1.2 Importance of Understanding the Machine

Understanding the Singer Manual Sewing Machine is crucial for optimal performance and longevity. Familiarity with its mechanics enhances troubleshooting, allowing users to address issues promptly; Proper knowledge ensures safety, preventing accidents like broken needles or damage from improper use. Maintenance becomes more effective, prolonging the machine’s lifespan. Recognizing its capabilities and limitations aids in selecting appropriate projects, maximizing creativity. In-depth understanding fosters efficiency and confidence, making sewing more enjoyable and rewarding. It also enables users to teach others and explore advanced techniques, fully utilizing the machine’s potential.

History of Singer Sewing Machines

Singer Sewing Machines, established in 1851 by Isaac Singer, introduced the first practical lockstitch design, revolutionizing home and industrial sewing, setting the standard for manual machines globally.

2.1 The Origins of Singer Sewing Machines

The Singer Sewing Machine Company was founded in 1851 by Isaac Singer, who revolutionized sewing with his practical lockstitch design. Singer improved upon earlier inventions, creating a user-friendly machine that simplified the sewing process. His innovation, the moving shuttle, enabled consistent stitching and made sewing accessible to both home users and industries. Singer’s machine quickly gained popularity, leading to the establishment of the company, which became a pioneer in sewing technology. This marked the beginning of Singer’s legacy as a leader in the sewing industry, shaping the future of manual sewing machines.

2.2 Evolution of Manual Sewing Machines

The evolution of Singer manual sewing machines began with continuous improvements to Isaac Singer’s original design. Early models featured cast-iron frames for durability and the introduction of the vibrating shuttle, enhancing stitching efficiency. Over time, Singer incorporated automatic tension and reverse stitching, making manual sewing more accessible. By the early 20th century, portable models like the Singer Redeye became popular, combining functionality with ease of use. These advancements solidified Singer’s reputation for innovation, ensuring manual sewing machines remained indispensable for both home and industrial use.

2.3 Key Innovations in Singer Sewing Machine History

Singer’s history is marked by groundbreaking innovations that revolutionized sewing. The introduction of the first practical sewing machine by Isaac Singer in 1851 was a milestone. The vibrating shuttle mechanism improved stitching speed and efficiency. Later, Singer pioneered the electric sewing machine, reducing manual effort; Portable designs, like the Singer 99K, enhanced accessibility for home users. These innovations not only advanced sewing technology but also made it more affordable and user-friendly, cementing Singer’s legacy as a leader in the industry. Each innovation built on the last, driving progress and adoption worldwide.

Key Features of Singer Manual Sewing Machines

Singer manual sewing machines are known for their durability, portability, and ease of use. They feature a mechanical design, offering reliable straight stitching without electricity, making them an affordable and practical choice for sewists.

3.1 Basic Components of the Machine

The Singer manual sewing machine consists of essential components that ensure smooth operation. Key parts include the machine head, balance wheel, hand crank, and stitch regulator. The machine head houses the needle bar, shuttle, and tension mechanisms. The balance wheel controls the manual rotation of the mechanism, while the hand crank powers the machine. Additional components like spool pins, tension discs, and the take-up lever help manage thread flow. The bobbin case and bobbin are crucial for forming stitches, and the base provides stability. Together, these parts create a durable and functional sewing system.

3.2 Stitching Capabilities and Patterns

The Singer manual sewing machine is known for its versatile stitching capabilities, offering precise control over stitch length and tension. It typically features a straight stitch and reverse stitch option, with some models allowing for adjustable stitch width. Users can create a variety of patterns, from basic running stitches to decorative designs, by manually guiding the fabric. The machine’s mechanical simplicity ensures consistent stitching, making it ideal for both everyday repairs and creative sewing projects. Its reliability and ease of use have made it a favorite among sewists for generations.

3.3 Durability and Build Quality

Singer manual sewing machines are renowned for their exceptional durability and robust build quality. Constructed from high-quality metal components, these machines are built to withstand the test of time. The heavy-duty frame ensures stability during operation, while the mechanical parts are designed for long-lasting performance. Unlike modern plastic-based machines, Singer manuals are known for their reliability and resistance to wear and tear. With proper care, they can remain functional for decades, making them a worthwhile investment for both hobbyists and professional sewists. Their timeless design and solid construction have earned them a reputation as dependable workhorses in the sewing world.

3.4 Portability andEase of Use

Singer manual sewing machines are designed with portability in mind, featuring a compact and lightweight construction that makes them easy to transport. Weighing between 10 to 15 pounds, these machines are ideal for sewists who need to move their equipment frequently. The handle integrated into the design further enhances portability. Additionally, their ease of use is a significant advantage, as they require minimal setup and offer straightforward operation. This makes them perfect for beginners and experienced users alike, allowing for a seamless sewing experience wherever creativity strikes.

Maintenance and Care Tips

Regular cleaning, proper lubrication, and storage are essential to extend the life of your Singer manual sewing machine and ensure smooth operation over time.

4.1 Cleaning the Machine

Regular cleaning is essential to maintain the performance and longevity of your Singer manual sewing machine. Use a soft-bristled brush to remove lint and debris from the bobbin area, tension discs, and stitch plate. For stubborn dust, compressed air can be used, but avoid spraying liquids directly on the machine to prevent damage. Gently wipe external surfaces with a damp cloth, ensuring no moisture seeps inside. Avoid harsh chemicals or abrasive cleaners, as they may harm the finish or mechanical components. Clean after each use to prevent dust buildup and ensure smooth operation.

4.2 Lubrication and Oil Requirements

Proper lubrication is crucial for the smooth operation of your Singer manual sewing machine. Use high-quality sewing machine oil, as specified in the user manual. Apply a few drops to the bobbin area, hooks, and moving parts every 10 hours of use. Avoid using household oils, as they can leave residue and damage the machine. Regular lubrication prevents rust, ensures stitch consistency, and extends the machine’s lifespan. Always refer to the manual for specific oil recommendations and application guidelines to maintain optimal performance and protect your investment.

4.3 Troubleshooting Common Issues

Common issues with Singer manual sewing machines include thread bunching, needle jams, or uneven stitching. To address these, first, check the thread tension and ensure proper threading. A jammed needle may require stopping the machine and gently removing the fabric. For uneven stitches, verify the needle size and fabric alignment. Regularly cleaning and lubricating the machine can prevent many problems. If issues persist, consult the user manual or contact Singer support for assistance. Proper maintenance and care can extend the machine’s lifespan and ensure smooth operation.

4.4 Storage and Preservation

Proper storage and preservation of your Singer manual sewing machine ensure its longevity and functionality. Always store the machine in a hard, protective case or cover to shield it from dust and moisture. Keep it in a dry, cool place, avoiding attics or basements prone to humidity. Clean the machine thoroughly before storage and apply a light layer of oil to prevent rust. For added protection, place a soft cloth over the machine before closing the case. Regularly check stored machines to ensure they remain in good condition.

Accessories and Attachments

Explore essential Singer manual sewing machine accessories like presser feet, bobbins, and needles. Discover optional attachments such as embroidery hoops and rufflers. Learn about Singer’s genuine parts availability and compatibility for enhanced versatility in your sewing projects.

5.1 Essential Accessories for Manual Sewing

Essential accessories for manual sewing with a Singer machine enhance your sewing experience. Bobbins are crucial for holding the bottom thread, while needles come in various sizes for different fabrics. A sewing notions kit includes threads, buttons, and pins. A measuring tape and seam ripper are handy for alterations. Additionally, a dust cover protects the machine, and a sewing box keeps supplies organized. These accessories ensure efficiency and creativity, making manual sewing more enjoyable and precise.

5.2 Optional Attachments for Versatility

Optional attachments for Singer manual sewing machines can significantly enhance versatility, allowing users to tackle a wider range of projects. These include specialized presser feet, such as zipper, buttonhole, and gathering feet, which simplify specific tasks. Additionally, attachments like tension gauges, seam guides, and rufflers can improve precision and expand stitching capabilities. Quilting and embroidery hoops are also popular for decorative sewing. These accessories are often interchangeable across Singer models, making them a valuable investment for crafters and sewists seeking to diversify their projects. Always ensure attachments are compatible with your machine for optimal performance.

5.3 Where to Find Genuine Singer Parts

Finding genuine Singer parts is essential for maintaining your manual sewing machine’s performance. Singer’s official website offers a dedicated section for replacement parts, ensuring authenticity and compatibility. Authorized Singer dealers and sewing machine retailers also carry a wide range of genuine components. Online marketplaces like Amazon and eBay often have verified sellers offering Singer parts, but be cautious to choose sellers with high ratings. Additionally, specialty sewing stores and vintage sewing communities may have rare or discontinued parts. Always verify the seller’s credibility to avoid counterfeit products and ensure optimal machine functionality.

Sewing Techniques and Projects

Mastering basic stitching, hemming, and embroidery on Singer manual machines enhances sewing skills. Explore creative projects like crafting bags, quilting, and tailoring garments with precision and ease.

6.1 Basic Sewing Techniques for Beginners

Mastering basic sewing techniques is essential for beginners using the Singer manual sewing machine. Start by learning to thread the machine correctly and wind the bobbin evenly. Practice the straight stitch, the most common stitch, by guiding fabric smoothly under the presser foot. Backstitching at the beginning and end of seams ensures durability. Familiarize yourself with fabric handling, maintaining consistent tension to avoid puckering. These foundational skills will build confidence and form the basis for more complex projects. Regular practice will refine your technique and improve stitching accuracy.

6.2 Advanced Projects for Experienced Users

For experienced users, the Singer manual sewing machine offers opportunities to tackle advanced projects that showcase precision and creativity. Tailored garments like suits, coats, and intricate evening wear can be crafted with ease, utilizing techniques such as padding, interlining, and hand-finishing. Upcycling old or vintage clothing into unique pieces, like turning denim into bags or dresses into skirts, is another challenging yet rewarding endeavor. Additionally, creating custom home decor items, such as embroidered cushions or appliqué table runners, allows users to explore their artistic side while leveraging the machine’s durability and portability.

6.3 Tips for Sewing Different Fabrics

When using a Singer manual sewing machine, it’s essential to adapt your technique to the fabric type. For cotton and linen, use a size 8 or 10 needle and standard tension. Silk and chiffon require a sharp needle (size 8 or 10) and reduced tension to prevent tearing. Denim and thick fabrics need a heavy-duty needle (size 14) and slightly loosened tension. For knits, loosen the needle thread tension to avoid puckering. Always pre-wash fabrics to ensure shrinkage is minimal. Using the correct presser foot and adjusting stitch length can also improve results. Experiment with scraps to find the perfect settings.

6.4 Common Mistakes to Avoid

When using a Singer manual sewing machine, common mistakes include improper threading, incorrect tension settings, and neglecting to use the right needle size. Forgetting to tie knots at thread ends can lead to loose stitches. Overloading the machine with thick fabrics or pulling fabric too forcefully can cause jamming. Skipping regular oiling and cleaning may result in mechanical issues. To avoid these, always follow the manual, use appropriate accessories, and maintain a steady fabric flow. Regular maintenance and patience are key to ensuring smooth operation and professional-quality stitches.

  • Incorrect threading can cause uneven stitches or machine jamming.
  • Using the wrong needle size may damage fabric or the machine.
  • Ignoring regular lubrication can lead to mechanical failure.

Identifying Your Singer Sewing Machine Model

Identifying your Singer manual sewing machine model involves locating the serial number, usually found on the base or near the handwheel. This number helps determine production details and model specifics, aiding in maintenance, repairs, and compatibility with accessories.

7.1 How to Locate the Serial Number

The serial number on a Singer manual sewing machine is typically located on the base or underside of the machine. It is often found near the bobbin case, handwheel, or on a small metal plate. The serial number is a unique series of numbers, sometimes combined with letters, that identifies the machine’s production details. To locate it, gently turn the machine over or remove the extension table. Use a flashlight if needed for better visibility. This number is essential for identifying the model, production year, and maintenance history of your Singer sewing machine.

7.2 Understanding the Model Number System

The Singer manual sewing machine model number system is a coded identifier that provides key information about the machine. Typically, the model number consists of a combination of letters and numbers, where the letters denote the series or type, and the numbers indicate specific features or production details. For example, models like “99K” or “201K” represent different mechanical setups. Understanding this system helps users identify their machine’s capabilities, production era, and compatibility with accessories. Singer’s model numbering has evolved over time, but the core structure remains consistent, aiding in quick identification and reference. Always consult official Singer documentation for precise decoding.

7.3 Researching Your Machine’s History

Researching your Singer manual sewing machine’s history can uncover its origins and significance. Start by noting the serial number, which provides production details. Visit Singer’s official website or vintage sewing communities for databases linking serial numbers to manufacturing dates. Additionally, consult antique dealers or sewing enthusiasts who specialize in vintage machines. This research can reveal rare models, such as the Singer 301 or Featherweight, and their historical value. Understanding your machine’s past enhances its sentimental worth and connects you to generations of sewers who used it before.

Singer Manual vs. Automatic Sewing Machines

Manual Singer sewing machines offer simplicity and portability, ideal for basic sewing tasks, while automatic machines provide advanced features and speed for complex projects, catering to different sewing needs.

8;1 Differences in Operation and Features

The Singer manual sewing machine operates via a hand crank or treadle, offering precise control over stitching speed. Automatic machines, however, rely on electric power, providing faster operation and automated features like thread cutting and stitch selection. Manual machines are lightweight, portable, and require manual thread tensioning, while automatic models are bulkier but offer advanced stitch options and convenience. The manual version is ideal for simple, precise tasks, while automatic machines suit high-volume sewing with less manual intervention, making each suitable for different sewing needs and preferences.

8.2 Choosing the Right Machine for Your Needs

When selecting a Singer manual sewing machine, consider your sewing frequency, skill level, and project types. Frequent sewers may prefer automatic machines for speed, while occasional users or beginners might find manual machines more straightforward. Assess the fabrics you work with; manual machines excel for lightweight to medium fabrics. Portability is another factor, as manual machines are often lighter. Budget also plays a role, as manual machines are generally more affordable. Ultimately, align your choice with your specific needs to ensure satisfaction and efficiency in your sewing projects.

8.3 Pros and Cons of Manual Machines

The Singer manual sewing machine offers a cost-effective and portable solution for sewing, ideal for small projects and repairs. It promotes skill development and control over stitches, appealing to hobbyists and traditionalists. However, it requires physical effort and time, especially for large projects. Limited stitch options and no automation are drawbacks. Despite these, its durability and simplicity make it a favorite among enthusiasts. Weighing these factors helps users decide if a manual machine suits their sewing needs and preferences.

The Role of Singer Manual Sewing Machines in Modern Sewing

Singer manual sewing machines are experiencing a resurgence in modern sewing due to their sustainability, revival of traditional practices, and alignment with DIY culture.

9.1 Sustainability and Eco-Friendly Sewing

The Singer manual sewing machine is an eco-friendly choice for sewing enthusiasts. Unlike automatic machines, it operates without electricity, reducing carbon footprint and energy consumption. Its durability ensures longevity, minimizing waste and the need for frequent replacements. Portability and ease of use make it ideal for repairs and DIY projects, promoting sustainable practices. By encouraging handcraftsmanship, it fosters a culture of reuse and repurposing fabrics, aligning with modern environmental values. This makes the Singer manual sewing machine a timeless tool for eco-conscious sewers.

9.2 Revival of Traditional Sewing Practices

The Singer manual sewing machine has played a significant role in the revival of traditional sewing practices. Many crafters and sewing enthusiasts are rediscovering the joy of working with mechanical machines, appreciating the tactile experience and precision they offer. This resurgence aligns with a broader movement toward handmade and slow fashion, where the value of craftsmanship is celebrated. Singer manual machines, with their durability and simplicity, have become a favorite among those seeking to connect with sewing’s rich heritage and create meaningful, long-lasting garments.

9.3 DIY and Craft Culture

The Singer manual sewing machine has become a cornerstone in DIY and craft culture, offering a tangible connection to traditional craftsmanship; Its simplicity and reliability make it ideal for handmade projects, from upcycled clothing to embroidery. Crafters appreciate the machine’s portability and ease of use, allowing for creativity in various settings. The resurgence of manual sewing aligns with a broader movement toward sustainable and personalized crafting. For many, the Singer manual sewing machine represents a tool that fosters creativity, self-sufficiency, and a deeper appreciation for the art of sewing.

Collecting Vintage Singer Sewing Machines

Vintage Singer sewing machines are highly sought after by collectors for their historical significance and craftsmanship. Popular models include the Singer 221 Featherweight and Singer 15-30. Collectors often look for machines in excellent condition, with original parts and minimal wear. Rare models or those with unique features can command high prices. Restoration is a common practice, with enthusiasts sourcing vintage parts to return machines to their former glory. The hobby combines nostalgia, creativity, and a deep appreciation for sewing history.

10.1 Popular Vintage Models to Collect

Vintage Singer sewing machines are highly sought after by collectors, with certain models standing out for their historical significance and craftsmanship. The Singer 15-30, known for its reliability, is a favorite among enthusiasts. The Singer 99K, with its compact design, is another popular choice. The Singer 66, featuring a robust construction, and the Singer 201, renowned for its quiet operation, are also prized. Additionally, the Singer 221 Featherweight, lightweight and versatile, is a beloved model. These machines are not only functional but also serve as timeless pieces of sewing history.

10.2 Restoring Old Machines to Working Condition

Restoring vintage Singer manual sewing machines requires patience and attention to detail. Start by thoroughly cleaning the machine, removing dirt and grime that may have accumulated over the years. Inspect for rust or corrosion and address these areas with appropriate treatments. Replace worn or damaged parts, such as belts or needles, with genuine Singer components. Lubricate moving parts to ensure smooth operation. For complex restorations, consider disassembling the machine, but always refer to original manuals or expert guides. Once restored, test the machine to ensure it sews evenly and efficiently. Finally, polish the exterior to preserve its vintage appeal.

10.3 Valuing and Appraising Vintage Machines

Valuing vintage Singer sewing machines requires consideration of condition, rarity, and demand. Machines in working order with original parts hold higher value. Rare models, such as early Singer 1 or 99K, fetch premium prices. Age, historical significance, and provenance also impact appraisal. Collectors and dealers often research auction records and market trends to determine fair prices. Professional appraisers can provide detailed evaluations, ensuring accurate valuations. Documenting a machine’s history enhances its appeal and value, making it a prized possession for collectors.

11.1 Final Thoughts on the Singer Manual Sewing Machine

The Singer manual sewing machine is a timeless tool that combines tradition with functionality, offering reliability and versatility for both hobbyists and professionals alike.

11.2 Encouragement to Try Manual Sewing

Embrace the tactile experience of manual sewing to unlock creativity and satisfaction. Start your journey with a Singer manual machine and discover the joy of handmade craftsmanship.

The Singer manual sewing machine is a timeless tool that combines simplicity with versatility, making it a valuable addition to any sewing kit. Its durability and ease of use ensure it remains a favorite among both beginners and experienced sewists. The machine’s portability and reliability make it ideal for various projects, from repairs to crafting. While it may lack the advanced features of modern automatic machines, its manual operation offers a satisfying, hands-on sewing experience. For those seeking a sustainable, cost-effective sewing solution, the Singer manual sewing machine is an excellent choice.

Embracing manual sewing with a Singer sewing machine is a rewarding journey that combines creativity and practicality. It allows for a deeper connection to the craft, offering control and precision that fosters a sense of accomplishment. Manual sewing encourages patience and mindfulness, making it a therapeutic hobby. Whether creating clothes, home decor, or repairs, manual sewing empowers individuals to produce high-quality, personalized items. It’s an eco-friendly choice, reducing reliance on fast fashion and promoting sustainability. Give manual sewing a try and discover the joy of crafting something truly unique and meaningful.

Additional Resources

Discover a wealth of resources to enhance your Singer manual sewing machine experience, including recommended books for techniques, online forums for community support, and local workshops for hands-on learning.

12.1 Recommended Books and Guides

For a deeper understanding of Singer manual sewing machines, several books and guides are highly recommended. “The Complete Book of Sewing Machines” provides a comprehensive history and maintenance tips. “Singer Sewing Machine Handbook” offers practical advice for troubleshooting and optimizing performance. “Manual Sewing Machine Repair” is ideal for DIY enthusiasts looking to restore vintage models. Additionally, “Vintage Sewing Machines: A Collector’s Guide” and “Sewing with Singer: A Beginner’s Guide” cater to collectors and newcomers, respectively. These resources enhance your Singer manual sewing machine experience.

12.2 Online Communities and Forums

Online communities and forums dedicated to Singer manual sewing machines offer valuable resources and support for enthusiasts. Platforms like Singer’s official forum, Reddit’s r/Sewing, and Facebook groups provide spaces to share tips, projects, and troubleshooting advice. These communities often include seasoned sewists and collectors who can offer insights into vintage models and maintenance. Additionally, specialized forums like QuiltingHub or SewingPartsOnline cater to specific needs, ensuring users can find tailored advice and connect with like-minded individuals passionate about manual sewing.

  • Join forums for troubleshooting and advice.
  • Share projects and gain inspiration from others.
  • Connect with experts and enthusiasts worldwide.

These platforms foster a supportive environment for learning and growing as a sewer, making them indispensable for both beginners and experienced users.

12.3 Workshops and Classes

Workshops and classes are excellent resources for mastering the Singer manual sewing machine. Many sewing studios and community centers offer hands-on sessions, covering basic maintenance, troubleshooting, and advanced stitching techniques. These classes provide personalized guidance, helping users optimize their machine’s performance. Online platforms also host virtual workshops, making learning accessible from home. Participants can gain confidence in their sewing skills and explore creative projects. Whether you’re a beginner or an experienced sewer, these classes offer valuable insights and practical experience to enhance your sewing journey with the Singer manual sewing machine.

ismaili dua book pdf

The Ismaili Dua Book is a sacred text central to the spiritual practices of the Ismaili Muslim community, offering prayers for guidance, peace, and enlightenment. Widely available as a PDF, it provides accessible spiritual guidance for daily life, fostering a deeper connection to faith and community.

Overview of the Ismaili Faith and Its Practices

The Ismaili faith, a branch of Shia Islam, emphasizes intellectual and spiritual growth, guided by the teachings of the Imam. Central to its practices is the recitation of Dua, a devotional prayer fostering a connection with the divine. The Ismaili community, led by the Aga Khan, values education, compassion, and service to humanity. The Dua Book, available as a PDF, is a vital resource for daily worship, offering structured prayers that promote unity and reflection. Its accessibility in digital formats ensures that Ismaili Muslims worldwide can engage with their faith seamlessly, integrating spiritual practices into modern life.

Significance of Dua in Ismaili Tradition

Dua holds a profound place in Ismaili tradition as a means of connecting with the divine and seeking spiritual enlightenment. It is a sacred practice that fosters inner peace, gratitude, and humility. The Ismaili community views Dua as a direct communication with Allah, emphasizing its role in guiding believers toward righteousness. The Dua Book, available in PDF format, is a cherished resource that provides structured prayers for various occasions, reflecting the community’s deep commitment to faith. Through regular recitation, Ismaili Muslims strengthen their spiritual bond and find solace in times of need, upholding a tradition that is both personal and communal.

Structure and Content of the Dua Book

The Ismaili Dua Book is a meticulously structured and organized collection of prayers, offering guidance for spiritual growth and daily devotion. Its content includes a variety of supplications, each serving specific purposes such as seeking forgiveness, expressing gratitude, or requesting divine protection. The prayers are often categorized by occasion, making it easier for believers to navigate and incorporate them into their routines. Available in PDF format, the Dua Book provides accessible and clear instructions for proper recitation, ensuring that the spiritual practices remain consistent and meaningful across the Ismaili community. Its structured layout enhances the worship experience, fostering a deeper connection to faith.

Historical Background of the Ismaili Dua

The Ismaili Dua Book traces its roots to early Islamic traditions, evolving over centuries through scholarly contributions and communal practices. Its digital PDF format ensures accessibility, preserving spiritual heritage while adapting to modern tech-savvy audiences.

Origins and Evolution of Ismaili Prayers

The Ismaili Dua Book originates from early Islamic prayer traditions, deeply rooted in the Quran and the teachings of Prophet Muhammad. Over centuries, Ismaili scholars refined these prayers, blending them with esoteric interpretations and communal rituals. The evolution reflects the community’s spiritual and intellectual growth, adapting to historical contexts while preserving core beliefs. Early prayers were simple, while later compositions became more intricate, incorporating philosophical and mystical themes. This gradual development underscores the dynamic nature of Ismaili worship, ensuring relevance across generations and cultural landscapes.

Key Historical Figures in Shaping the Dua Tradition

Prominent Ismaili leaders and scholars have played a pivotal role in shaping the Dua tradition. The Prophet Muhammad and Imam Ali laid the spiritual foundation, influencing early Ismaili prayers. Later, figures like Imam Jafar al-Sadiq and Imam Ismail contributed to the theological depth of the Duas. The Fatimid Caliphs and prominent da’is further enriched the tradition, blending it with esoteric knowledge. In modern times, the Aga Khan IV has championed the preservation and accessibility of the Dua Book, ensuring its relevance for contemporary followers. These leaders’ contributions have shaped the Dua Book into a vibrant, evolving spiritual resource.

Development of the Dua Book Over the Centuries

The Ismaili Dua Book has evolved significantly over centuries, shaped by theological, cultural, and historical contexts. Early versions were simple, focusing on essential prayers. During the Fatimid era, the Dua became more structured, incorporating esoteric interpretations. Manuscripts were carefully preserved, with scribes adding commentaries. The book’s evolution continued through the Alamut and Anjudan periods, reflecting spiritual and philosophical advancements. In modern times, the Aga Khan IV has emphasized its importance, leading to its translation and digital availability. This enduring text remains a cornerstone of Ismaili spirituality, adapting to contemporary needs while preserving its sacred essence.

Key Features of the Ismaili Dua Book

The Ismaili Dua Book contains structured prayers, supplications, and spiritual practices, reflecting deep theological insights. It emphasizes the role of the Imam and fosters a personal connection with the divine.

Core Prayers and Their Meanings

The Ismaili Dua Book includes core prayers like Dua-e-Qunut and Dua-e-Tawassul, which are recited to seek divine guidance and intercession. These prayers emphasize the role of the Imam as a spiritual guide and a bridge to the divine. They also highlight themes of gratitude, forgiveness, and the pursuit of spiritual enlightenment. The prayers are deeply rooted in Islamic theology and are designed to foster a personal connection with Allah. Their meanings are profound, offering comfort, strength, and a sense of purpose to believers. The PDF version of the Dua Book provides easy access to these sacred texts for modern devotees.

Importance of Recitation and Proper Etiquette

Recitation of the Ismaili Dua holds immense spiritual significance, fostering a deep connection with the divine. Proper etiquette, such as maintaining cleanliness and focus, ensures the purity of intention and sincerity in worship. The PDF version of the Dua Book provides easy access to these sacred texts, enabling believers to recite with precision and devotion. Regular recitation strengthens spiritual discipline, promotes mental clarity, and nurtures a sense of community. Observing etiquette honors the sacred nature of the prayers, while the digital format ensures accessibility, making it easier to integrate Dua into daily life for spiritual growth and harmony.

Role of the Dua Book in Daily Life

The Ismaili Dua Book serves as a spiritual companion, guiding believers in their daily worship and fostering a deeper connection with faith. Its prayers and supplications provide comfort, inspiration, and direction, helping individuals seek blessings, strength, and wisdom. The PDF format enhances accessibility, allowing believers to carry the Dua Book on digital devices, ensuring it remains a constant presence in their lives. Regular recitation from the Dua Book promotes mindfulness and gratitude, while its teachings inspire reflection and personal growth. It bridges the spiritual and mundane, offering solace and guidance in everyday challenges;

Benefits of Reciting the Ismaili Dua

Reciting the Ismaili Dua fosters spiritual growth, emotional balance, and strengthens community ties, providing solace, clarity, and inspiration in daily life through its divine teachings and blessings.

Spiritual Growth and Enlightenment

Reciting the Ismaili Dua Book nurtures spiritual growth by deepening one’s connection with the divine. It fosters self-reflection, humility, and a heightened sense of purpose, guiding believers toward spiritual elevation. Through heartfelt supplications, individuals seek divine guidance, forgiveness, and enlightenment, strengthening their faith and inner peace. The Dua Book serves as a powerful medium to attain spiritual clarity, helping adherents navigate life’s challenges with grace and wisdom. Regular recitation cultivates a profound understanding of one’s spiritual identity and duties, fostering a stronger bond with the Almighty and the Ismaili community’s timeless traditions.

Emotional and Mental Well-being

The Ismaili Dua Book plays a crucial role in enhancing emotional and mental well-being by offering comfort and solace through its heartfelt prayers. Regular recitation helps alleviate stress and anxiety, fostering inner peace and emotional stability. The supplications guide believers in navigating life’s challenges with resilience and hope. The repetitive nature of the Dua also aids in mental focus and clarity, acting as a spiritual tool for mental harmony. This practice promotes a sense of calm and overall well-being, essential for maintaining balance in a fast-paced world.

Strengthening Community Bonds

The Ismaili Dua Book fosters a sense of unity and togetherness among believers, strengthening community bonds through collective spiritual practices. Congregational recitations during prayer times create a shared sense of purpose and identity. The Dua Book includes prayers for the well-being of the entire Jamat, encouraging believers to think beyond individual needs and embrace collective responsibility. This shared spiritual practice reinforces bonds of brotherhood and mutual support, reflecting the Ismaili community’s emphasis on harmony and solidarity. By reciting Dua together, believers strengthen their connection to one another and to their faith, fostering a vibrant and cohesive community.

Transliterations and Translations of the Dua Book

The Ismaili Dua Book is available in multiple languages, including English, Gujarati, and Urdu, ensuring accessibility for diverse communities. Transliterations and translations preserve the sacred text’s essence while making it understandable to a broader audience, fostering spiritual inclusivity and unity.

Availability of Translations in Multiple Languages

The Ismaili Dua Book is accessible in various languages, including English, Gujarati, Urdu, and others, catering to diverse linguistic communities. PDF versions are widely available online, ensuring ease of access for devotees globally. These translations maintain the sanctity of the original Arabic text while making the prayers understandable to non-Arabic speakers. The availability of the Dua Book in multiple languages reflects the Ismaili community’s efforts to preserve spiritual unity while respecting cultural and linguistic diversity. This accessibility has been further enhanced through digital formats, allowing worldwide distribution and fostering inclusivity.

Importance of Understanding the Dua

Understanding the Dua is essential for devotees to connect deeply with its spiritual significance. The Ismaili Dua Book PDF contains prayers rich in meaning, offering guidance for both worldly and spiritual life. Grasping the essence of the Dua allows individuals to reflect on its teachings, fostering a stronger bond with faith. It also enables believers to align their actions with ethical and moral values. This understanding enhances the effectiveness of prayer, making it a meaningful practice rather than a mere ritual. Comprehending the Dua enriches spiritual growth and promotes a sense of purpose and harmony in daily life.

Challenges in Translating Sacred Texts

Translating sacred texts like the Ismaili Dua Book presents unique challenges. Maintaining the spiritual essence and linguistic nuances of the original text is crucial. Cultural and contextual differences often complicate the process, as certain phrases may lack direct equivalents in other languages. Additionally, preserving the theological depth while ensuring accessibility to a diverse audience requires meticulous care. Balancing accuracy with readability is a constant struggle, making translation a delicate yet essential task for spreading spiritual knowledge globally.

Digital Availability and Accessibility

The Ismaili Dua Book is widely available in digital formats, including PDF, ensuring easy access for the global Ismaili community. Official websites and platforms offer downloads, making it convenient for followers to access and recite prayers digitally.

PDF Versions of the Dua Book

The Ismaili Dua Book is readily available in PDF format, offering followers a convenient and accessible way to engage with the prayers. Official Ismaili websites and trusted platforms provide free downloads, ensuring the community can easily access the text. The PDF format is widely compatible with various devices, making it simple to read on smartphones, tablets, or computers. This digital version preserves the sacred content while allowing for easy sharing and reference. Many PDFs are meticulously designed to maintain the original structure and spiritual essence, making them a popular choice for daily recitation and study.

Online Platforms for Downloading the Dua Book

The Ismaili Dua Book in PDF format is widely available on official Ismaili websites and trusted online platforms. These platforms ensure easy and secure access to the sacred text, catering to the global Ismaili community. Users can download the PDF directly from these sites, often without registration or fees. The availability of these resources reflects the community’s commitment to preserving and sharing spiritual knowledge. Digital platforms also facilitate quick updates and ensure the content remains accessible to followers worldwide, fostering a connected and informed community.

Convenience of Digital Formats

The digital format of the Ismaili Dua Book offers unparalleled convenience, allowing users to carry the sacred text on smartphones, tablets, or laptops. This portability ensures accessibility anytime, anywhere, making it ideal for daily recitation and spiritual reflection. Digital versions eliminate the need for physical storage, enabling easy sharing and quick downloads. Advanced search features and bookmarks enhance navigation, while adjustable fonts cater to individual preferences. The PDF format also supports multiple devices, ensuring a seamless experience across platforms. This modern approach bridges tradition with technology, making the Dua Book more accessible than ever before.

How to Use the Ismaili Dua Book Effectively

To use the Ismaili Dua Book effectively, recite prayers with concentration and understanding. Integrate daily recitation into your routine for spiritual growth and mindfulness, seeking guidance when needed.

Step-by-Step Guide to Recitation

To effectively recite the Ismaili Dua, begin with proper preparation, ensuring ablution and a clean environment. Start with specific prayers like the Ismi Azam for spiritual focus. Recite with concentration, understanding the meaning to deepen connection. Follow the order of prayers as outlined in the Dua Book PDF, adhering to prescribed times and etiquette. Incorporate physical acts like prostration when required. Conclude with gratitude and reflection, seeking divine blessings. This structured approach enhances the spiritual experience, fostering mindfulness and devotion.

Integrating Dua into Daily Routine

Integrating the Ismaili Dua into daily life enriches spiritual practice and fosters mindfulness. Begin each day with morning prayers, setting a positive tone. Incorporate Dua during pivotal moments, such as before meals, meetings, or challenging tasks, seeking guidance and strength. Consistency is key; allocate specific times for recitation, ensuring it becomes a habit. Reflect on the meanings to deepen your spiritual connection. The Ismaili Dua Book PDF offers accessible guidance, helping believers seamlessly weave prayer into their routines, enhancing both personal and communal spiritual growth while navigating modern life’s demands.

Seeking Guidance from Religious Leaders

Seeking guidance from religious leaders is crucial for understanding and practicing the Ismaili Dua effectively. They provide insights into the deeper meanings of the prayers and offer practical advice on recitation. Leaders like missionaries and scholars often organize community programs to explain the significance of specific Duas, ensuring followers grasp their spiritual value. Their guidance helps individuals connect with the Dua on a personal level, fostering a stronger spiritual bond. Additionally, they may recommend the Ismaili Dua Book PDF for easy access, emphasizing the importance of consistency and proper etiquette in daily practice.

Cultural and Social Impact of the Dua Book

The Ismaili Dua Book strengthens cultural identity and fosters community unity, preserving traditions and promoting harmony among followers worldwide, now accessible as a PDF.

Role in Preserving Ismaili Identity

The Ismaili Dua Book plays a vital role in preserving the cultural and spiritual identity of the Ismaili community. It serves as a cornerstone for transmitting traditions, values, and spiritual practices across generations. By incorporating specific prayers and rituals, the Dua Book reinforces a sense of belonging and connection to the community’s heritage. Its widespread availability, including in PDF formats, ensures that Ismaili traditions remain accessible and vibrant, even in a globalized world. This preservation of identity fosters unity and continuity, enabling followers to maintain their unique spiritual and cultural legacy.

Influence on Community Practices and Traditions

The Ismaili Dua Book profoundly influences community practices, serving as a guiding text for daily and special rituals. It standardizes prayers and ceremonies, fostering unity in worship across the global Ismaili community. The book’s structured format ensures consistency in practices, from weddings to mourning rituals. Its availability in PDF has further enhanced accessibility, allowing younger generations to learn and participate in traditions. This uniformity strengthens cultural and religious coherence, ensuring that Ismaili traditions remain vibrant and relevant in contemporary times, while maintaining their timeless spiritual essence and communal bonds;

Global Reach and Diversity of the Ismaili Community

The Ismaili community, spanning over 25 countries, reflects a rich tapestry of cultural and linguistic diversity. The Ismaili Dua Book PDF serves as a unifying resource, accessible to all, regardless of geographical location. Its digital format transcends borders, ensuring that Ismailis worldwide can engage with sacred prayers in their native languages. This accessibility fosters a sense of global unity, bridging cultural gaps and reinforcing shared spiritual values. The Dua Book’s widespread availability in multiple languages further caters to the community’s diversity, making it a vital tool for spiritual connection in the modern, interconnected world.

Comparative Analysis with Other Religious Texts

The Ismaili Dua Book PDF shares similarities with other religious texts in its emphasis on spirituality and divine connection but offers unique structured prayers reflecting Ismaili theology.

Similarities with Other Islamic Prayers

The Ismaili Dua Book PDF shares commonalities with other Islamic prayers in its emphasis on praising Allah, seeking forgiveness, and asking for divine guidance. Many of the supplications (duas) are rooted in Islamic theology and reflect universal themes of humility, gratitude, and the quest for spiritual closeness to God. Phrases like “Allahumma” (O Lord) and “Alhamdulillah” (Praise be to Allah) are frequently used, aligning with broader Islamic prayer traditions. The structured format and repetitive use of certain phrases also resonate with practices in other Islamic communities, highlighting shared spiritual aspirations and values.

Unique Aspects of the Ismaili Dua

The Ismaili Dua Book PDF contains unique liturgical practices specific to the Ismaili tradition, blending spiritual and intellectual dimensions. Unlike other Islamic prayers, it incorporates distinctive supplications (duas) and liturgies (qibla) that reflect the Ismaili emphasis on the intellect (aql) and the spiritual guidance of the living Imam. The structured format, with its repetitive rhythms and symbolic language, fosters a deep connection to divine wisdom. Additionally, the book’s focus on esoteric interpretation and the mystical dimensions of faith sets it apart, offering a rich tapestry of spiritual growth and enlightenment tailored to the Ismaili community’s unique identity and aspirations.

Universal Messages of Peace and Harmony

The Ismaili Dua Book PDF emphasizes universal values of peace, compassion, and unity, transcending cultural and religious boundaries. Its prayers often invoke blessings for all humanity, reflecting a shared aspiration for harmony. The duas encourage followers to cultivate love, forgiveness, and justice, aligning with global ethical principles. This inclusive approach resonate with people of diverse faiths, fostering a sense of interconnectedness. The book’s teachings inspire believers to contribute to a more equitable and peaceful world, embodying the Ismaili community’s commitment to human dignity and collective well-being. These universal messages are a cornerstone of its spiritual and moral guidance.

The Ismaili Dua Book PDF serves as a profound spiritual guide, enriching individual faith and fostering community unity while remaining relevant in modern times globally.

The Ismaili Dua Book PDF holds profound spiritual and cultural significance, serving as a cornerstone of faith and practice for the Ismaili community. It contains sacred prayers and supplications, guiding believers in their spiritual journey and fostering a deeper connection with the divine. The Dua Book is not only a source of comfort and guidance but also a symbol of tradition and heritage. Its digital availability ensures accessibility for modern generations, preserving its relevance while maintaining the essence of timeless spiritual wisdom. It remains a vital tool for nurturing faith, unity, and enlightenment within the Ismaili community worldwide.

Final Thoughts on Its Role in Modern Times

The Ismaili Dua Book PDF continues to play a vital role in modern times, serving as a spiritual anchor for believers in an increasingly fast-paced world. Its digital accessibility ensures that followers can easily incorporate Dua into their daily lives, regardless of location. The Dua Book bridges tradition and modernity, offering timeless wisdom and solace. As a unifying force, it strengthens community bonds and fosters spiritual growth. Its relevance endures, making it an indispensable resource for Ismailis seeking guidance, peace, and connection to their faith in contemporary society.